


Most people are used to seeing backdrops in theaters, but it is not the only place they are being used.
You can use them for various events, from simple photoshoots to gala dinners and smaller stage shows. In those cases, you won’t need a super big theatrical backdrop, but something smaller and more convenient.
Ladies and Gentlemen, The Pop-Up Backdrop
Because we wanted to make the backdrop set-up process as easy as possible, especially for people who are not in the theater and don’t use large, heavy backdrops, we decided to introduce the new pop-up drop by Grosh Backdrops & Drapery. It is smaller than standard full-size theatrical backdrops, comes in a very convenient case, and you can set it up yourself, even if you don’t have any equipment.
How to Set Up a Pop-Up Backdrop
To set up the pop-up drop you rented, follow these simple steps:
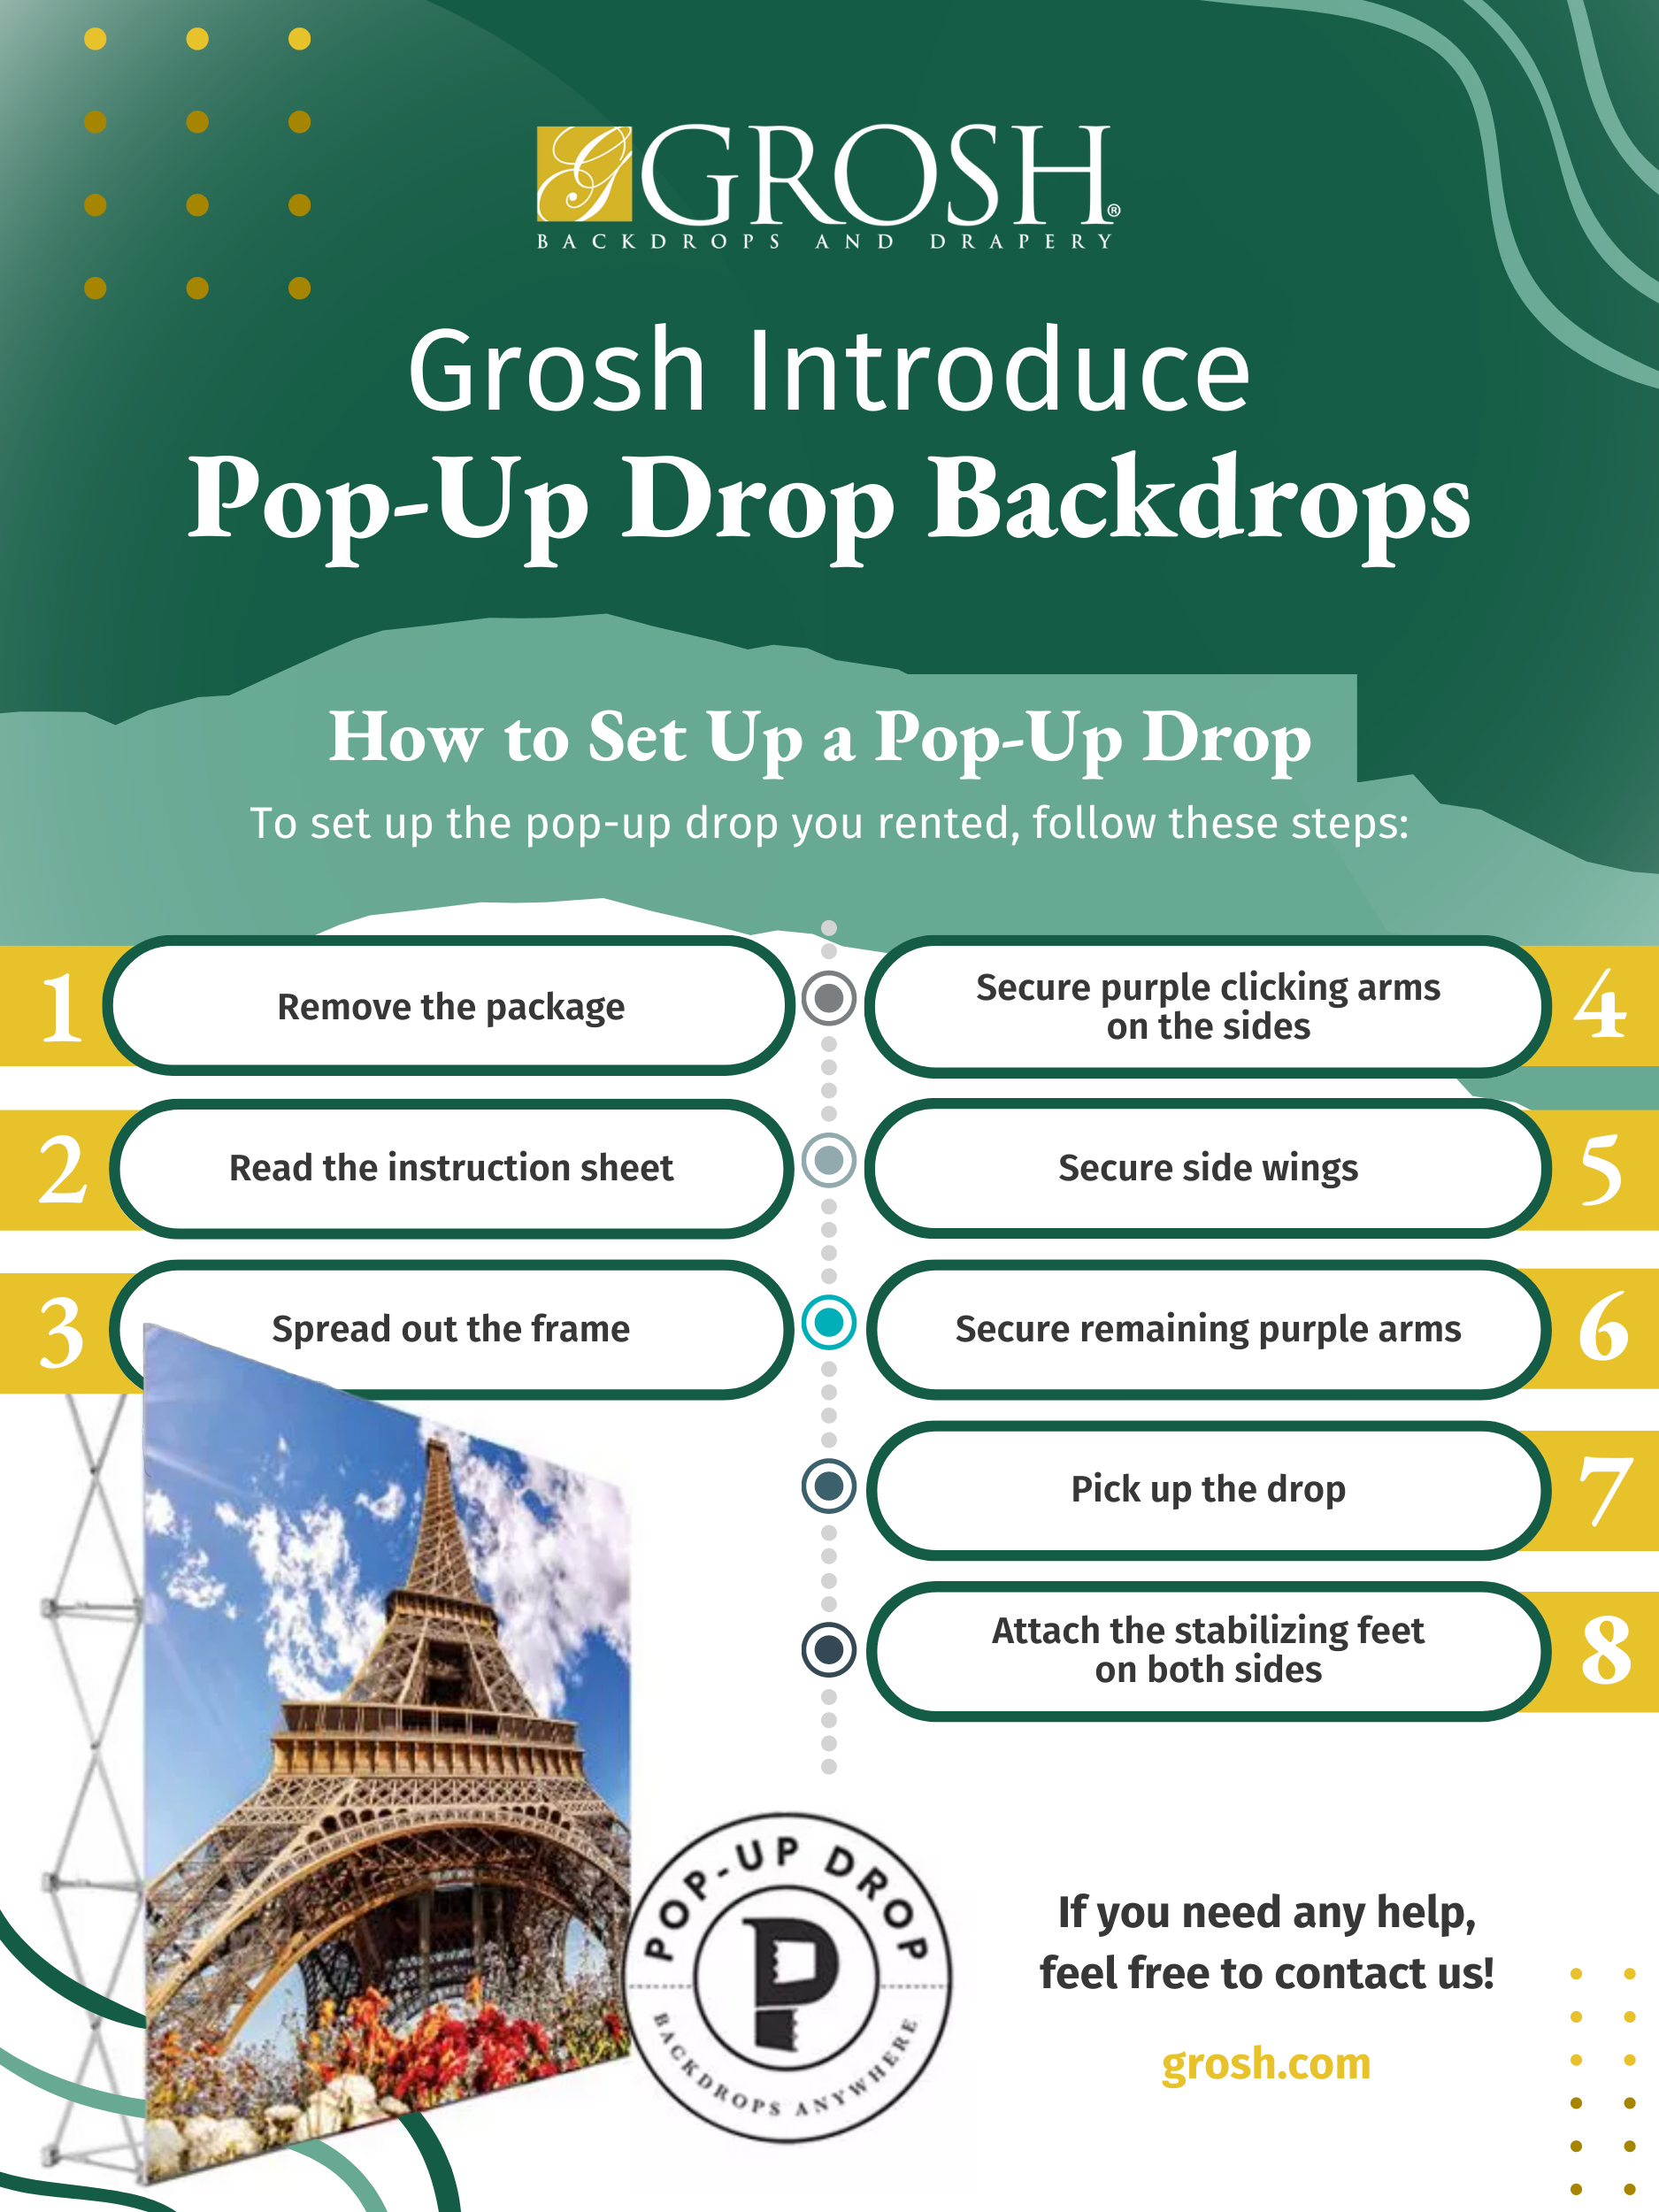
- Unpack the rented backdrop from the case. First, undo the latches, on all four sides, then remove the lid, and lift the canvas bag out, straight up.
- Once you have the bag out of a shipping container, simply roll it back on its back, undo the straps, unzip, and the first thing you’ll come to is the instruction sheet.
- Please carefully read the instruction sheet. It is very important to read all steps, one through six.
- Once your backdrop is out on the floor, the first thing you want to do is spread it all the way out. Completely flat. Sometimes it takes a little shaking to do that.
- Line up the purple arms correctly. Start on one corner, and work your way around. Please be very careful lining up the purple clicking arms. No need to rush it. Sets up in a snap.
- Once you’ve done the whole perimeter, you’ll take the side wings and belt them to the corners. There are tabs along the side.
- Lift the backdrop straight up, and there will be additional six clicking arms on the back.
- Before you click them, make sure that they’re lined up correctly by gently pulling out on the aluminum bars.
- Once you made sure they’re all lined up correctly, simply snap them all together. And now we’re ready to see what our backdrop looks like.
After you assembled the rented backdrop and connected all clicking arms, it is time to stabilize it and place it where you want it to stand.
8×10 Pop-up Drop setup instructions PDF File.
Final Steps of the Set Up
The pop-up drop has a stabilizing foot at each side so that it can stand on its own once you pick it up. This is how you can add stabilizers and finalize your rented pop-up backdrop setup process.
- Start with a large opening on the stabilizing foot, going towards the inside. Gently lift the frame off the floor.
- Line the stabilizers opening to the hub.
- Gently flatten it into place.
- Repeat the process on the other side.
Now that you have your stabilizing feet in position, you’re ready for your event. If you need help or come across any inconvenience during your setup process, feel free to contact us! We will gladly help you!